Let's Build a HTML and CSS Landing Page with Parcel
An intro tutorial to Parcel by building and deploying a static website with HTML, SASS and JavaScript for free. Includes starter templates.
 https://aileenrae.co.uk/blog/lets-build-a-landing-page-with-parcel url
 Ever wanted to dive straight into building a simple HTML page without having to faff around with build configuration?
Sure, there are amazing online tools like Codepen, but I'm talking something you can run locally with hot reloading, something you can easily build and deploy with minimum setup.
I wanted just that, and that's when I learned about Parcel.js. The "blazing fast, zero configuration web application bundler".
Unlike Webpack, a bundler which offers maximal configurability, Parcel prefers a minimal config approach. It handles most imports out-of-the box, with no need to manually install plugins.
If that sounds good and you want some free project templates to start from already, I've got you covered. 😉 They're at the bottom of this article. Curious to learn more? Let's build a landing page together to see how it works.
Let's build a landing page
We're going to build and deploy this landing page designed by Codewell.
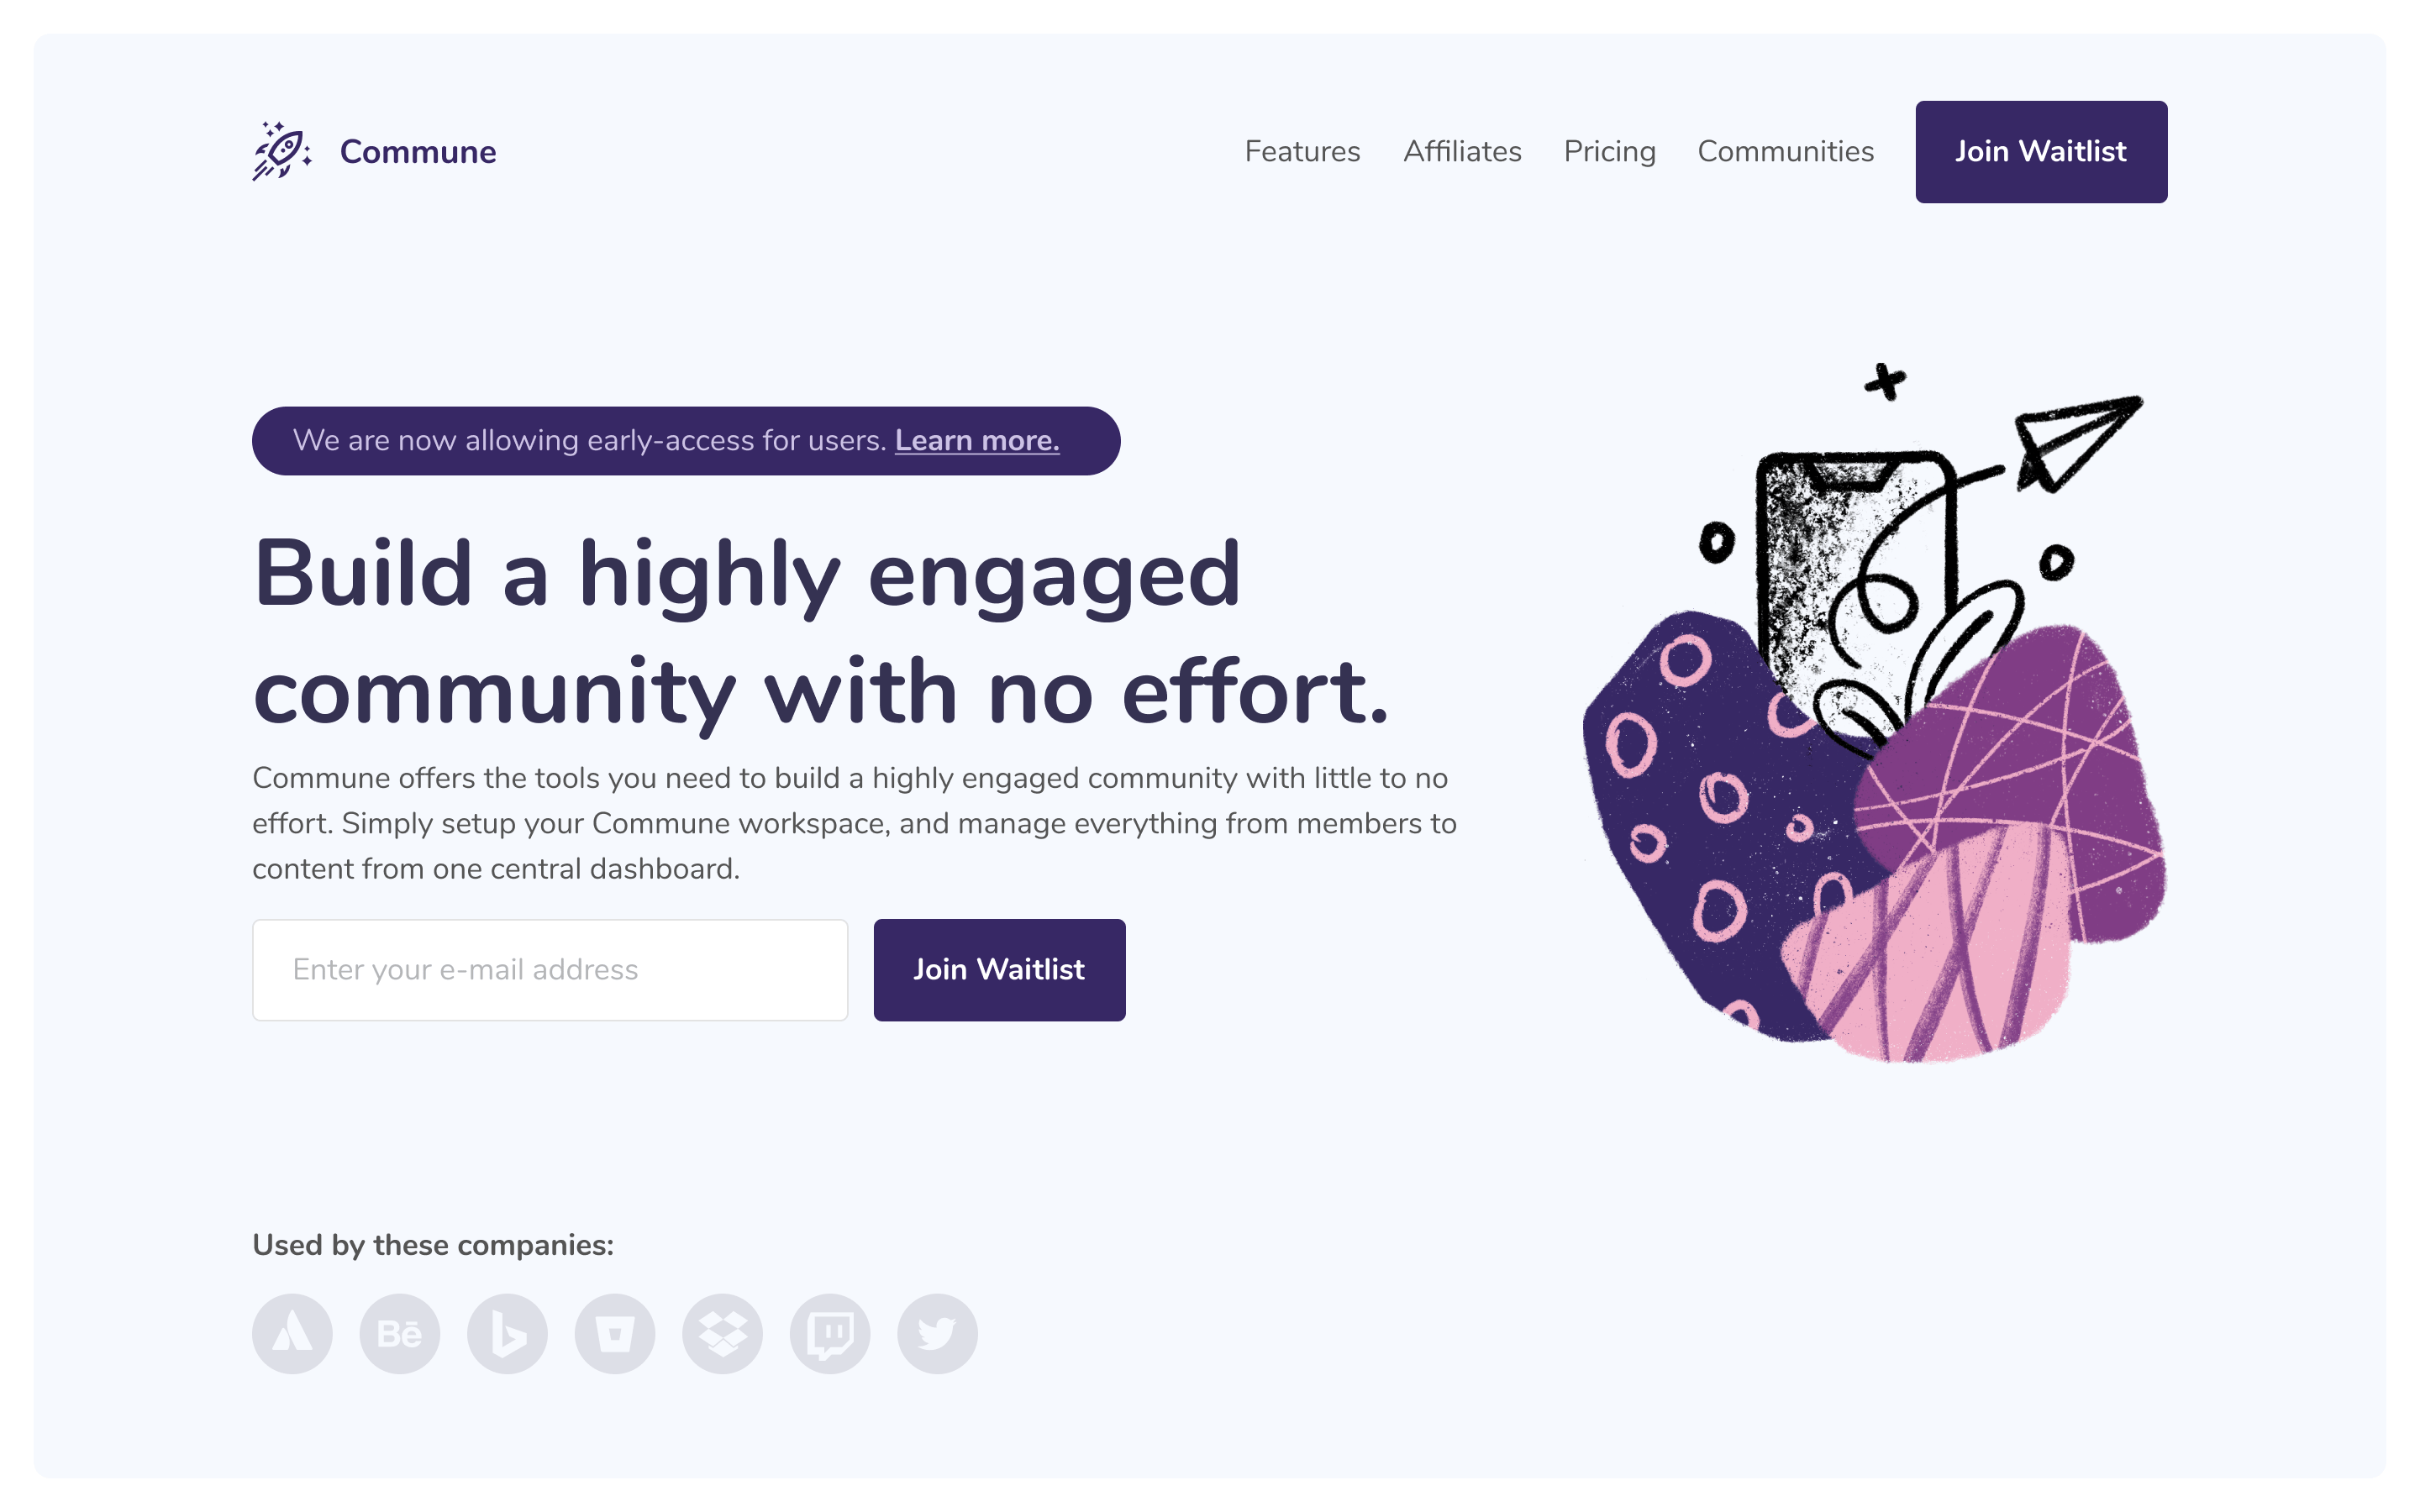
We'll be using SASS and posthtml, which can be used with Parcel with minimal configuration. Finally we're using Netlify to deploy our landing page for free.
Hello World page
First, we'll get a simple "hello world" up and running with Parcel. You'll need the npm CLI installed for this.
-
Create a directory to host the project and make it your current directory.
$ mkdir commune-waitlist-page $ cd commune-waitlist-page -
Run
npm initand follow the prompts (defaults are fine). -
Open the directory in your favourite code editor. You should have a
package.jsonfile. Remove the"main": "index.js",line, since Parcel will not need it. -
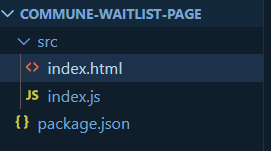
Next let's add our main HTML and JS files. Create a
srcdirectory and create two files namedindex.htmlandindex.js, with the following content:<!-- index.html --> <!DOCTYPE html> <html lang="en"> <head> <meta charset="UTF-8" /> <meta http-equiv="X-UA-Compatible" content="IE=edge" /> <meta name="viewport" content="width=device-width, initial-scale=1.0" /> <title>Commune Waitlist Page</title> </head> <body> <h1>Commune</h1> <script type="module" src="./index.js"></script> </body> </html>// index.js console.log("Hello world! 👋");Your directory should now look something like this:
-
Finally, let's add Parcel! Run
$ npm install -D parcel@nextto save Parcel v2 as a dev dependency. Then add the following to the "scripts" property in
package.json:"start": "parcel serve ./src/index.html", "build": "parcel build ./src/index.html" -
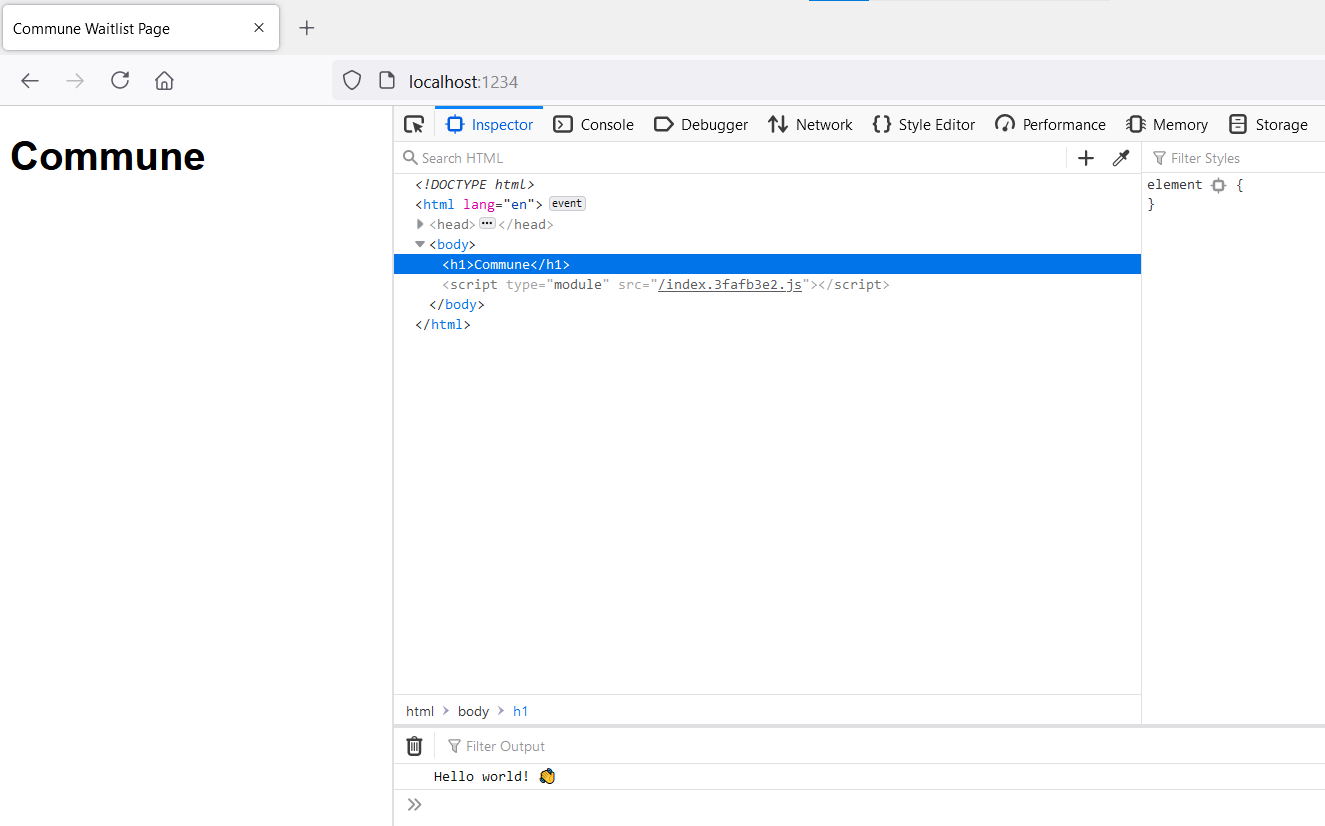
Run
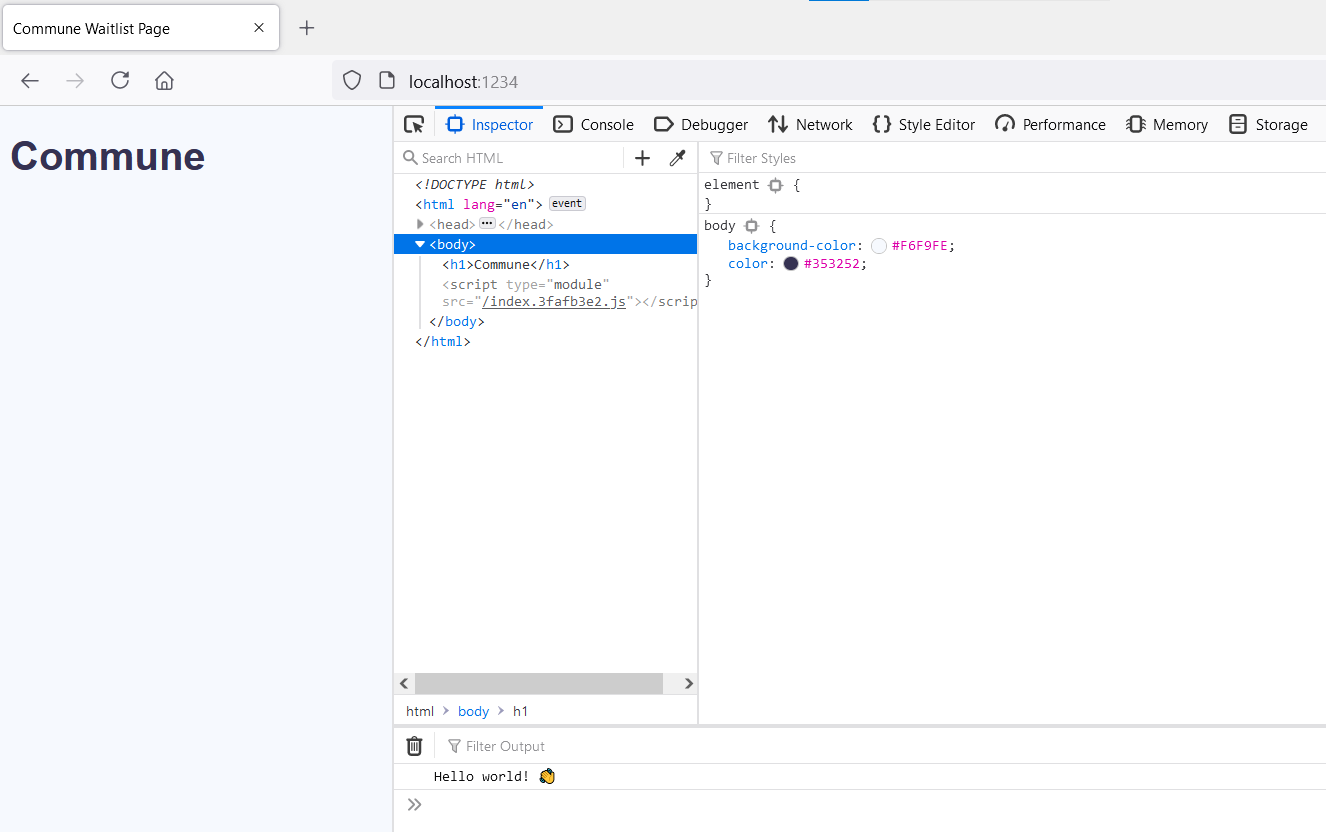
npm startand open http://localhost:1234 in your browser to see your Hello World app running locally!
Unlike other bundlers, Parcel uses an HTML file as its entry point, as you can see in the parcel serve and parcel build commands we added to package.json. Parcel detects any JavaScript or CSS dependencies directly from the entry HTML file then bundles it appropriately.
Add SASS styles
Being able to use SASS for my stylesheet is one of my biggest motivations for using a bundler for a simple frontend app like this. Parcel makes adding SASS a breeze.
-
In the
srcdirectory, create a file calledstyles.scss. For the sake of this demo, I am using it to create two SASS variables and set them as thecolorandbackground-colorof the page:// styles.scss $background-color: #F6F9FE; $color: #353252; body { background-color: $background-color; color: $color; } -
Add the following line to your
index.htmlfile:then switch back to the browser to see your style changes.<link rel="stylesheet" href="./styles.scss" />
That's it! ✨ No plugins to install, no config files to add, nothing. SASS just works.
Behind the scenes - as soon as you hit "save" on index.html - Parcel read the file and saw it referenced a .scss file. It then went and installed the appropriate SASS plugin for you and rebuilt for hot reload. In fact, if you inspect your package.json file you'll see Parcel has added the @parcel/transformer-sass plugin to your dev dependencies for you.
Separating HTML into partials with posthtml-include
Our index.html file is small at the moment, but it's going to get pretty long as we build the landing page. It becomes tedious scrolling up and down a long HTML file to make edits.
One way to avoid that is to split our HTML into separate partial .html files. Parcel offers a plugin for posthtml, which lets us do this. It requires a small config file.
Let's try this by adding a partial for the navigation bar on the landing page.
-
At the root of your project directory (where
package.jsonlives), create a new file called.posthtmlrccontaining the following:{ "plugins": { "posthtml-include": { "root": "./src" } } } -
In the
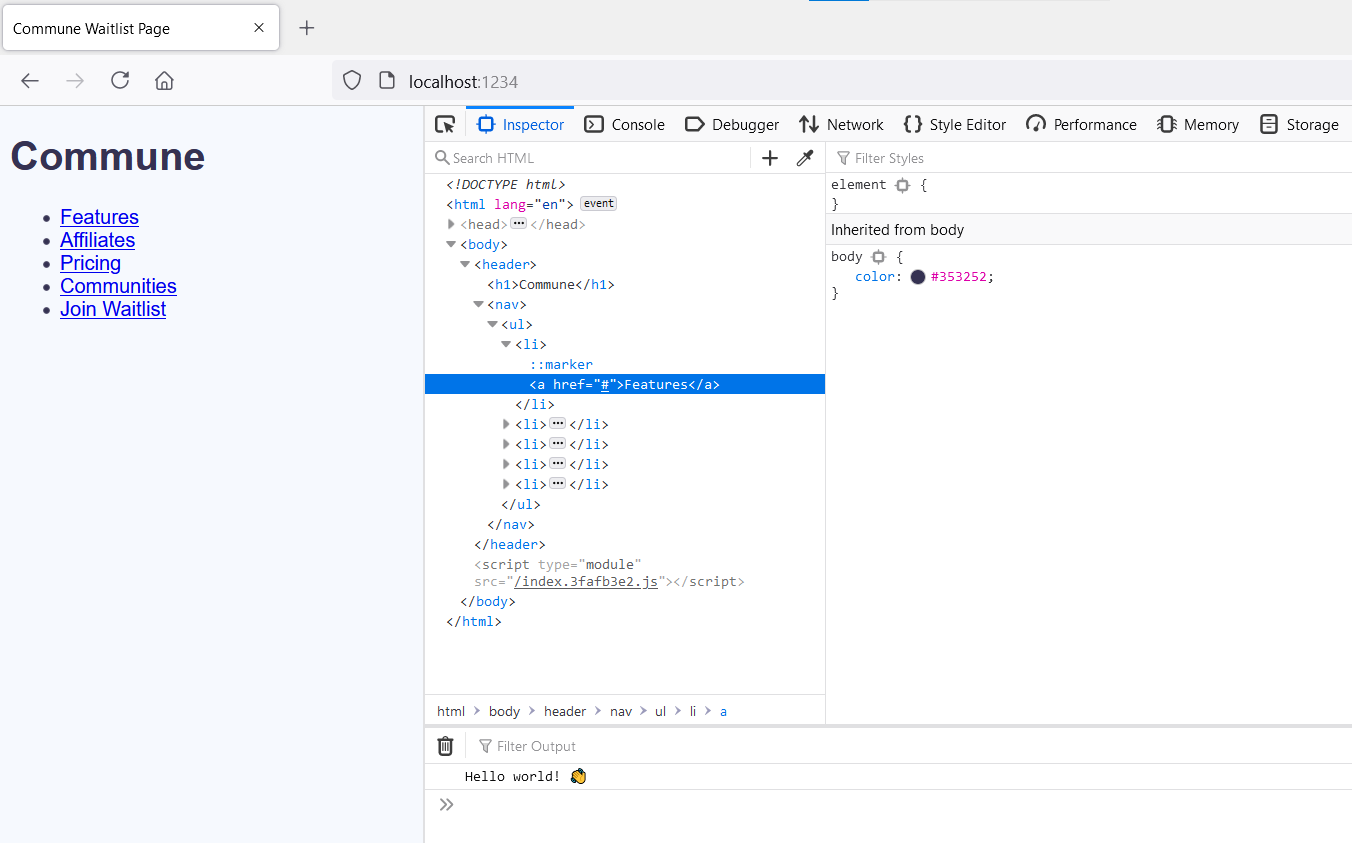
srcdirectory, create a new directory calledpartials. Inpartials, create a new file callednav.htmlwith the following content:<nav> <ul> <li><a href="#">Features</a></li> <li><a href="#">Affiliates</a></li> <li><a href="#">Pricing</a></li> <li><a href="#">Communities</a></li> <li><a href="#">Join Waitlist</a></li> </ul> </nav> -
Then, replace the
<h1>Commune</h1>line inindex.htmlwith the following:<header> <h1>Commune</h1> <include src="partials/nav.html"></include> </header> -
If npm throws an
EPERMerror, cancel the process with Ctrl+C and runnpm startagain.
Once again, that's it! ✨ If you inspect your package.json file you will see that Parcel has installed the necessary package for you: posthtml-include in this instance.
I want to use TypeScript!
I'm not on the TypeScript train yet, but I hear you! Parcel has you covered. Here's a contrived example to prove it.
-
First, let's rename our
index.jsfile toindex.tsand update the reference inindex.htmlaccordingly. You may need to restart the app. -
It works! But let's add some TypeScript-specific code to convince ourselves. Replace the contents of
index.tswith:function consoleLogWithEmoji(message: string, emoji: string): void { console.log(message + " " + emoji); } consoleLogWithEmoji("Hello world!", "👋");
Easy-peasy! Unfortunately though, Parcel doesn't perform TypeScript type checking out-the-box. Further TypeScript details are outwith the scope of this article, but you can learn how to configure type-checking in the Parcel documentation.
Installing extra dependencies & finishing the landing page
I won't waste your time walking through every piece of HTML and CSS I added to build the landing page. If you'd like to see the changes I made you can see the diff on GitHub here.
With Parcel we can install npm packages just like we can with other bundlers. As a finishing touch, I'm going to add some light animation using the animate on scroll library.
To use animate on scroll, run
npm install aos --save
in the project root directory. Next we add
import AOS from 'aos';
import 'aos/dist/aos.css';

AOS.init();
to our index.js file. You can also add additional configuration options to the AOS.init() call. See the AOS docs for details.
Now we can add data-aos="animation_name" to any element you want to animate in. I added data-aos="fade" to the page wrapper div, then some other fade in animations after a short delay.

It's done! 🎉 One last thing before we can build for production...
Cross-Browser Support
Before we deploy our app, let's add some basic cross-browser support. Parcel doesn't transpile any code out-of-the-box, but we can add support for some older browsers with browserslist.
Simply add
"browserslist": [
    "defaults"
]
to package.json to configure browserslist's recommended cross-browser support. You can check out the browserslist repo for more configuration options.
Now let's get this thing deployed!
Deploying our landing page
We're going to use Netlify to deploy our landing page. I love using Netlify to host my frontend projects because it connects directly to GitHub, it's super quick and easy to set up, and it's free!
If you're not already using GitHub to host your code there's a guide for pushing your code to a GitHub repository here.
To deploy the code from GitHub to Netlify:
-
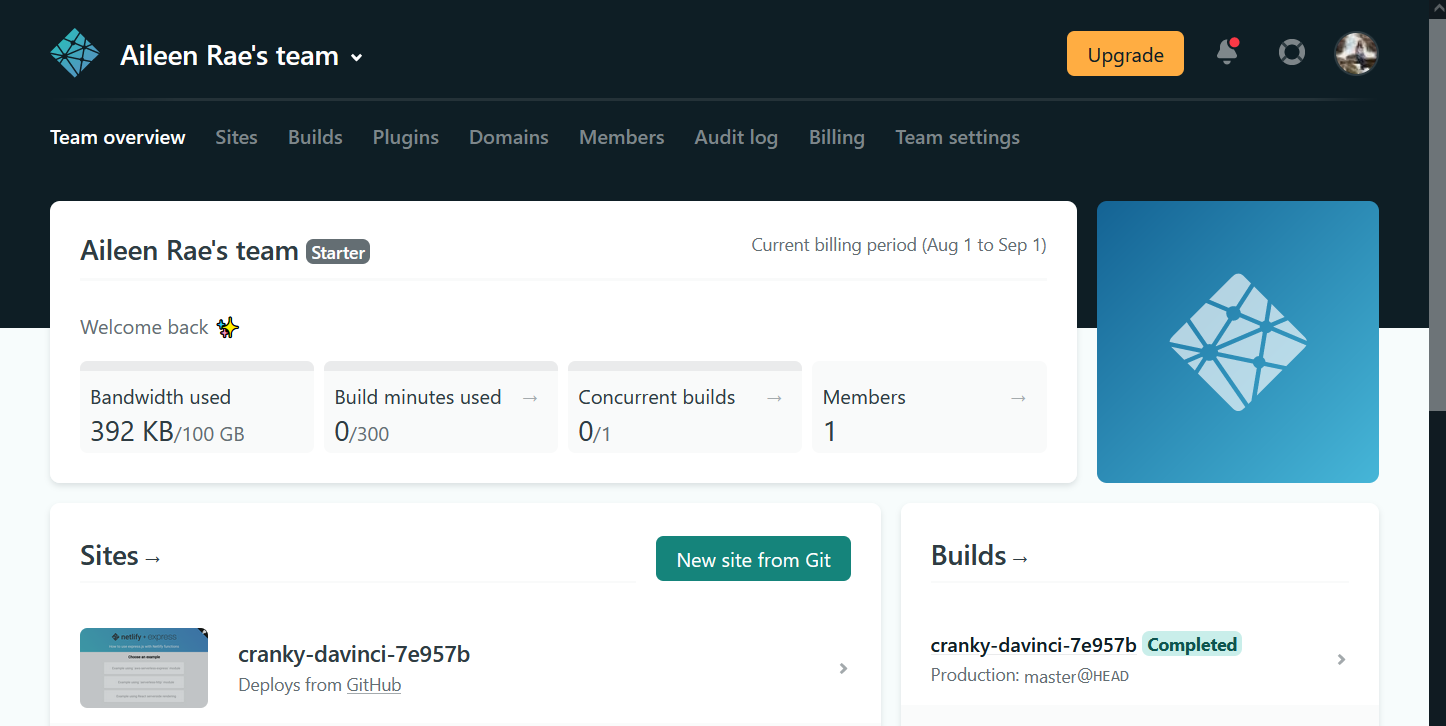
Login or sign-up to Netlify.
-
On the overview page, click "New site from Git".
-
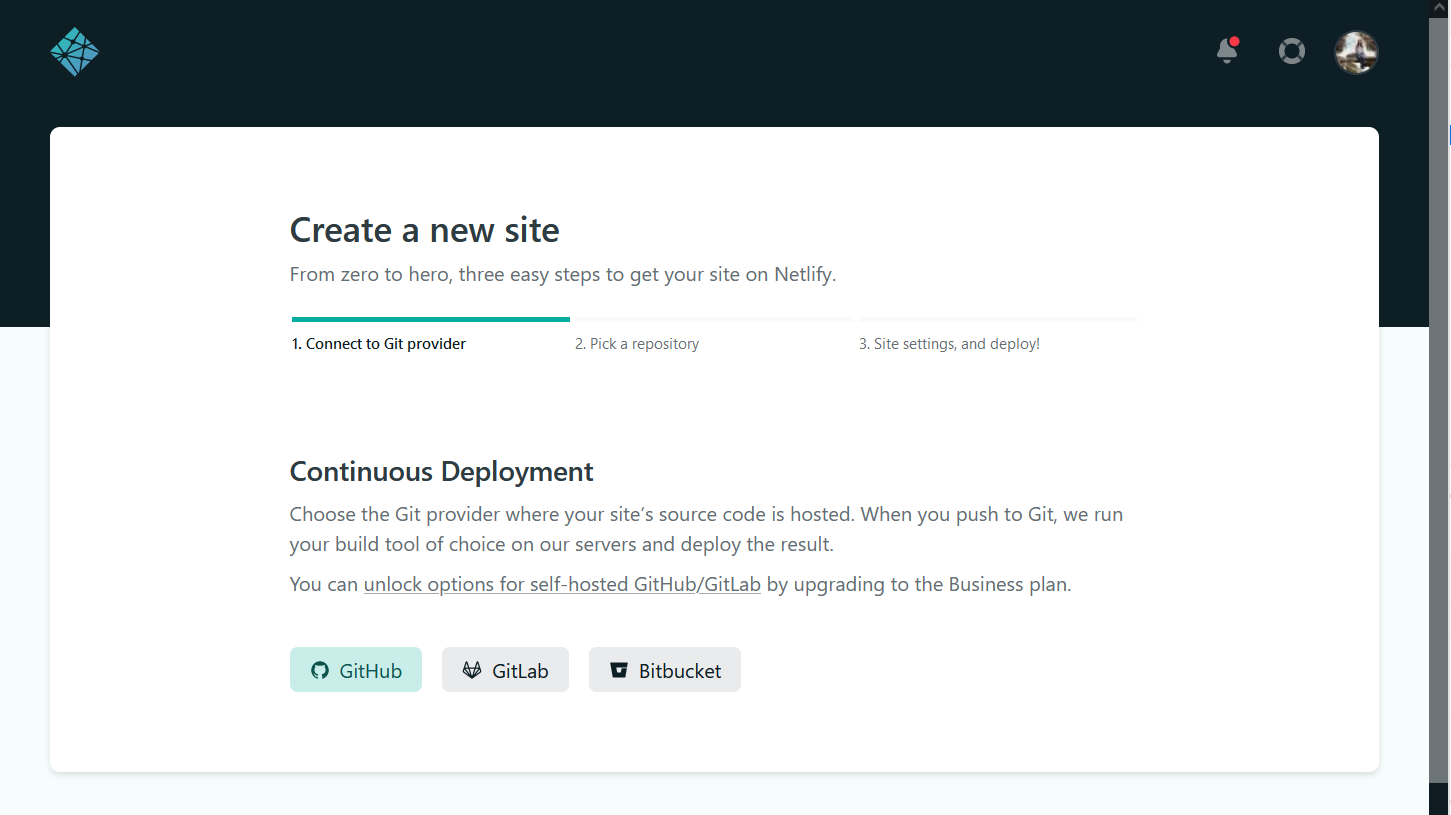
Choose "GitHub" as your Git provider. There is also the option to choose GitLab or BitBucket.
-
On the next page of the wizard, select the GitHub repository for your project.
-
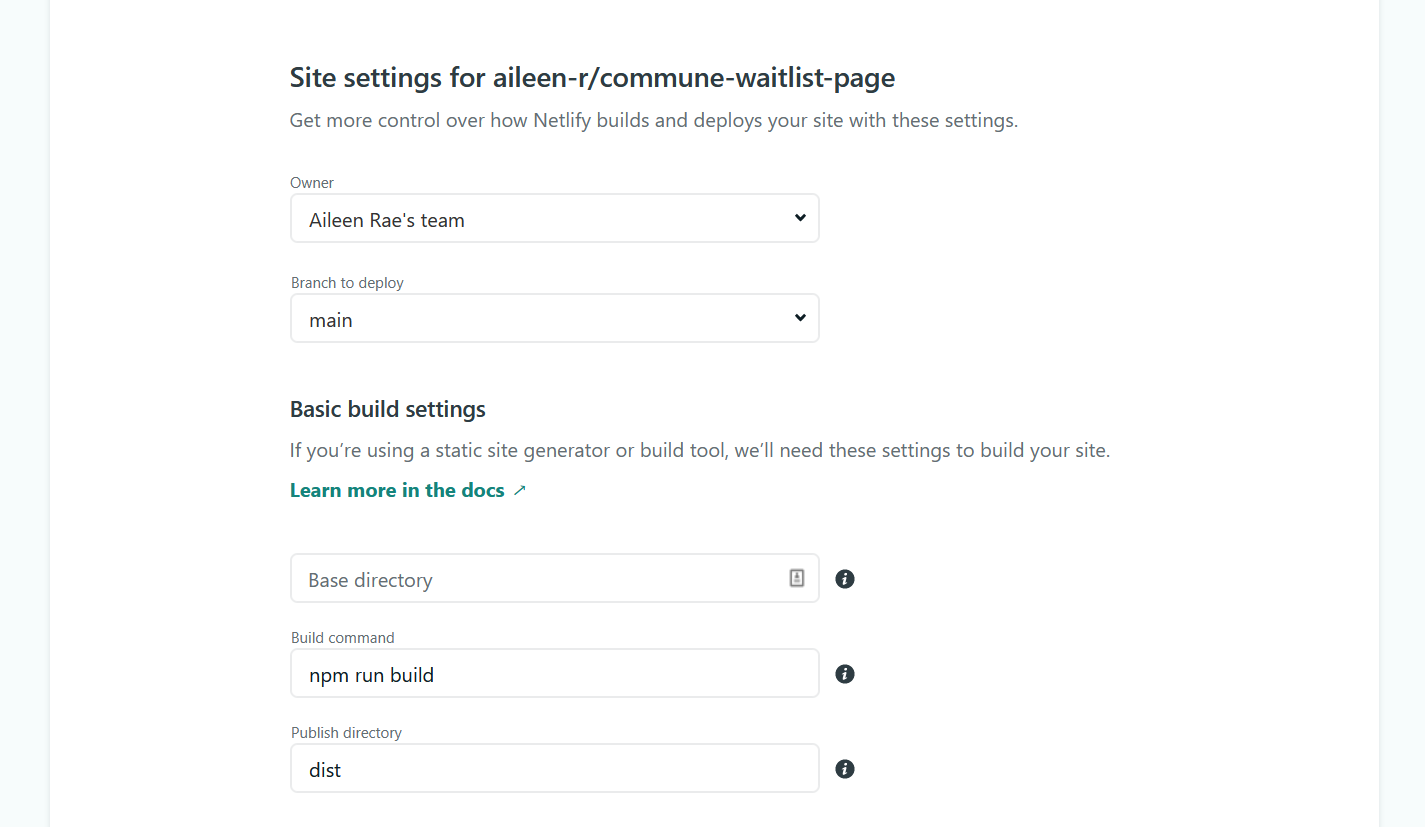
All the default site settings are correct for us, but let's quickly break the build settings down:
- Base directory - This is the directory where you run npm commands like
npm startandnpm run build. For us, this is the root directory so this should be blank. - Build command - The command for creating a production build. This is
npm run build, which we added topackage.jsonback when we first built a Hello World page."build": "parcel build ./src/index.html" - Publish directoy - This is the name of the directory that is outputted from
npm run build. For us this isdist, which is the default from Parcel.
- Base directory - This is the directory where you run npm commands like
-
Click "Deploy site".
-
Netlify will create a randomly generated URL for you like elegant-elion-c301a1.netlify.app. You can edit this by clicking "Site settings" then "Change site name".
-
Once the last production deploy has a green "Published" badge next to it, your website is live! It will re-deploy any time you push code changes to the default branch of your GitHub repository.
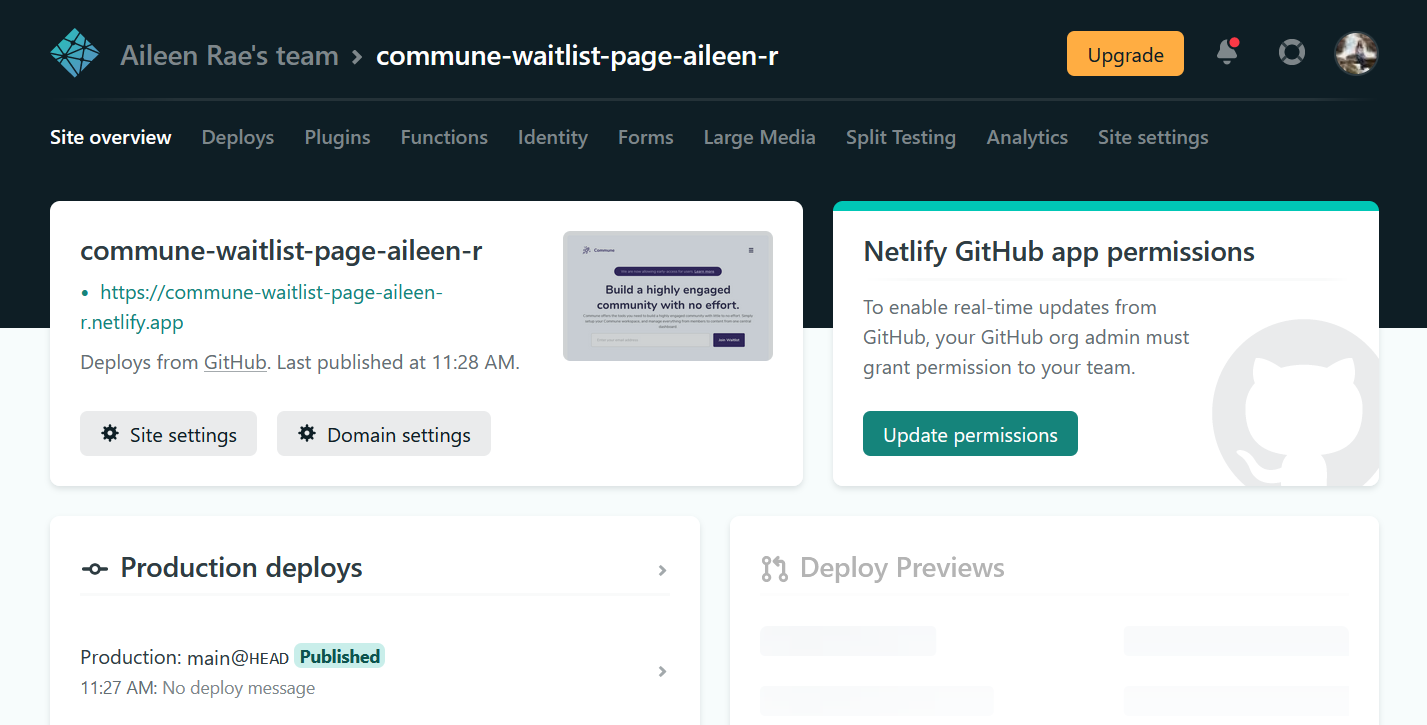
And it's done! My landing page now lives at https://commune-waitlist-page-aileen-r.netlify.app/ 🚀
Some downsides
My overall experience of using Parcel was a happy one, since I could get up and running super quickly. That being said I did hit a couple of snags along the way.
Hot reload sometimes fails to recompile and you have to manually kill the app then rerun npm start. I noticed this when:
- Saving a SASS file with a syntax error, like a missing semi-colon. Fixing the error and re-saving doesn't force a recompile like I would expect. This is obviously only an issue when using SASS.
- Making an edit to an HTML file. About 50% of the time it would throw an
EPERMpermissions error since it was trying to rename a file that was currently in-use by the running process (npm start). It's possible this error only occurs when using posthtml-include, but I haven't investigated further.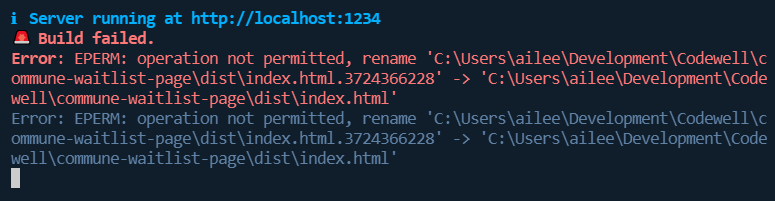
While this is a bit of a nuisance, the app startup time is quick so it never interrupted my flow.
Another hurdle I ran into was cross-browser support. While everything worked smoothly for semi-modern browsers, Internet Explorer 11 support was a different issue. First there is an issue running dev server in IE11, and you have to manually install polyfills yourself. I chose to ignore IE11 support since Microsoft is finally retiring the browser in 2022. If you need to continue to support IE...well, may the force be with you.
It's worth noting that I've been using v2 of Parcel, which at the time of writing is still at its first release candidate build.
Takeaways
Parcel is great for small projects. I've specifically found it to be perfect for setting up technical test solutions while job hunting as it makes it easy to add Jest for unit testing without using a JS framework starter kit like Create React App.
If I found myself needing more configurability, I would probably still pick Webpack first.
One thing Parcel offers which I didn't try is using it for React or VueJS apps. Personally I think the starter projects generated by Create React App and Vue CLI are easy enough to get started with, so I don't see a need to try and use Parcel. If anyone has used Parcel for React or Vue I'd love to hear your experience with it in the comments.
One-click deploy starter templates
If reading a tutorial isn't your thing and you want to dive headfirst into code, I've prepared some starter templates for you. Each has a "deploy to Netlify" button which creates your own copy of the repository and deploys it to Netlify for free with one click!
- HTML, CSS, and JavaScript starter template with Parcel
- HTML, SASS, and JavaScript starter template with Parcel
If you find any of the templates useful please let me know. Thanks for reading!